This is the final product in the kitchen. At least for now. The table decorations came from Big Lots and I spent less than $15 on everything. The inspiration for the banner came from a friend's Instagram of a Pinterest inspired piece. While I made mine by my own design here's a link to a similar page found while searching "Thanksgiving Garland" on Pinterest. I used some leftover burlap from another craft project, cut out 11 triangle sized pieces and got to work. I used a waterproof marker to mark off the letters I would need onto the burlap. Then I used a silver/mettalic gray (my white seemed to have disappeared from the craft drawer) acrylic paint to go over them. I put 2 coats on, maybe 3 for the more finicky letters and let them dry for a bit. Using some jute string and some heat 'n bond I got to work stringing them together. I left about an inch and a half of space between each piece. I tied loops at each end and used small 3M hooks to hang it up. The entire project took about 45 minutes to complete.
 This is a better look at our kitchen table! No one ever eats in the kitchen, so our table is usually full of things, as you can see it quickly accumulated. Everything on the table I got for some great prices! The table cloth only cost me $3! And the centerpiece with the candle holder in the center was on clearance for $8.50. Filled with some potpourri to help the house smell a little more festive. The entire kitchen rang in at under $15.
 |
| Picked this up for only $2.99 at the Salvation Army. Great addition to the fall theme and adds a little something to the desk area in our kitchen. |
We also are working on having a "Thankful Tree" on our very blank walls in the kitchen. This is also known as "Caitlin turns her roommates into second graders" because I no longer have kids who will willingly and excitedly craft with me.
"Symbolizing eternal hope, a wreath goes round and round. And where it starts or ends cannot be found."
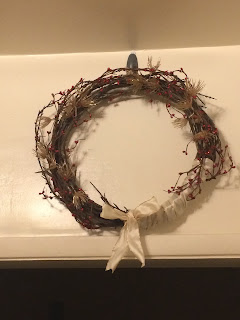
As part of my mission to stay out of trouble, I've been crafting among other things. One of my projects that I wanted to take on was to create a wreath that could be used as a transition from the fall holidays into the winter holidays. In case you didn't know, wreath forms are not the cheapest thing in the world, especially when you're on the kind of budget I was trying to stick to. So I decided I'd try my luck at a thrift store and try to find one to deconstruct and make my own. After my first stop was a complete bust, my second stop was a gold mine. There were a ton of wreaths at great prices. I picked up this gem for $1.99 and made a pit stop at Michael's on the way home to do it up.
 |
| Not the most holiday looking wreath in the whole world, huh? |


No comments:
Post a Comment